White Dandelion Works
-
Join 23 other subscribers
-
Recent Posts
Meta
I’m forever sticking pins places they shouldn’t be! An armrest, my shirt, my mouth, among other places. Since having a toddler around, this is generally bad because he sees me do it, but then I tell him not to and he doesn’t understand why. So I needed a pincushion that was small enough to move around the house and stable enough not to wobble when I put pins in it. I have the standard tomato pincushions, but I’ve never been fond of them. They tend to move when I go to stick them. I have one that is too big to tote around for small projects and another that is falling apart.
I found a helpful tutorial on VintageImageCrafts.com, though theirs is made with a teacup, any vessel would work!
Scraps to the rescue!
I had a little ceramic pot that I picked up at a thrift shop for a quarter.
I filled the bottom with cotton fabric selvages and packed it tightly.
I took some left over wool batting and loosely wadded it in a scrap of cashmere. I gathered up the edges pulling them together into a ball shape.
For size comparison… the ball is almost the same size as the pot.
I secured the ball in the pot by running a bead of hot glue around the rim and pushing the ball down into it.
Here is the finished result.
Since all the materials reclaimed or recycled, the cost was less than 50 cents.
It is nice a heavy, so it doesn’t topple or move when I put pins in it. And it is small enough to scoop up and take with me where ever I am in the house.
I needed to make a Nook cover/case for the my husband. He finally decided that he wanted it made from the same green canvas that his Miniature Case is made from. This was good, since I had some large scraps leftover. I only had to buy the thread and black velcro. The corrugated plastic was for strength, and durability. My husband is in the military and needs things to be robust.
First I measured out about how big it needed to be and cut 2 pieces of corrugated plastic to fit. I actually cut these down a little bit for a better fit. Always better to start off larger than smaller. :)
I laid the plastic pieces on the canvas to figure out the right size I needed. Then cut out the front, back, and a layer of batting to add a little bit of cushion.
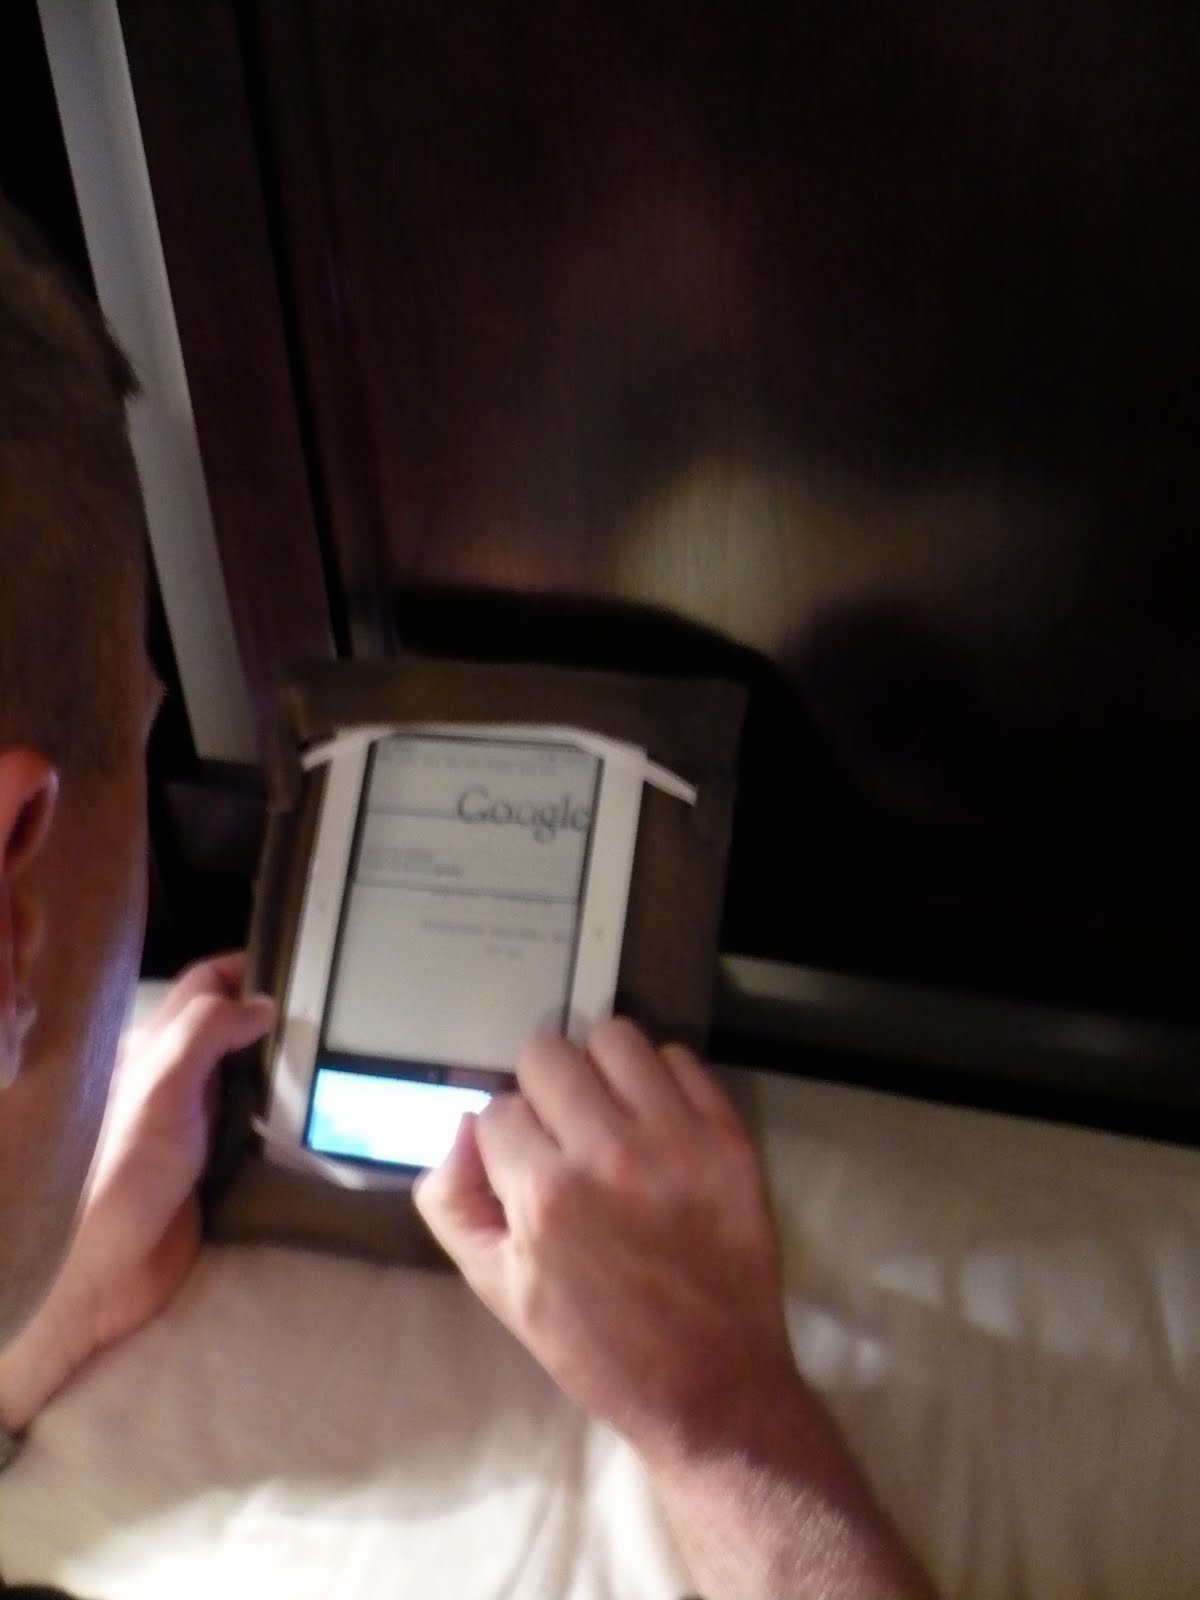
After layering the body pieces with the plastic and nook, I tested it out for sizing and fit.

The Batting is between the plastic and the inner canvas layer.
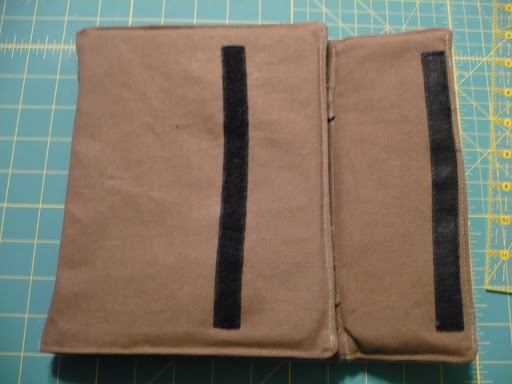
I sewed an old BDU name tape on the inside, he didn’t want it on the outside.
Double layered pockets on the top and bottom of the Nook help keep it from sliding out either end and prevent dust from getting in the ports.
After sewing on the name tape and velcro and layering the canvas and batting inside out, I sewed around 3 edges then flipped it right side out and top stitched around the 3 sides.
I inserted the first plastic panel and sewed it in place by running a straight stitch along the edge. My zipper food came in very handy here.
I did the same with the second panel then finished off the end by folding in the raw edges and top stitching it closed. I added in some elastic bands anchored with more canvas for strength. It was also decided to add another plastic panel to the flap to make it rigid.
The elastic pulls some when the cover is flat, but when the to end sections are folded around to the back everything lays flat.
The velcro also connects when the ends are folded around to the back keeping them from flapping around.
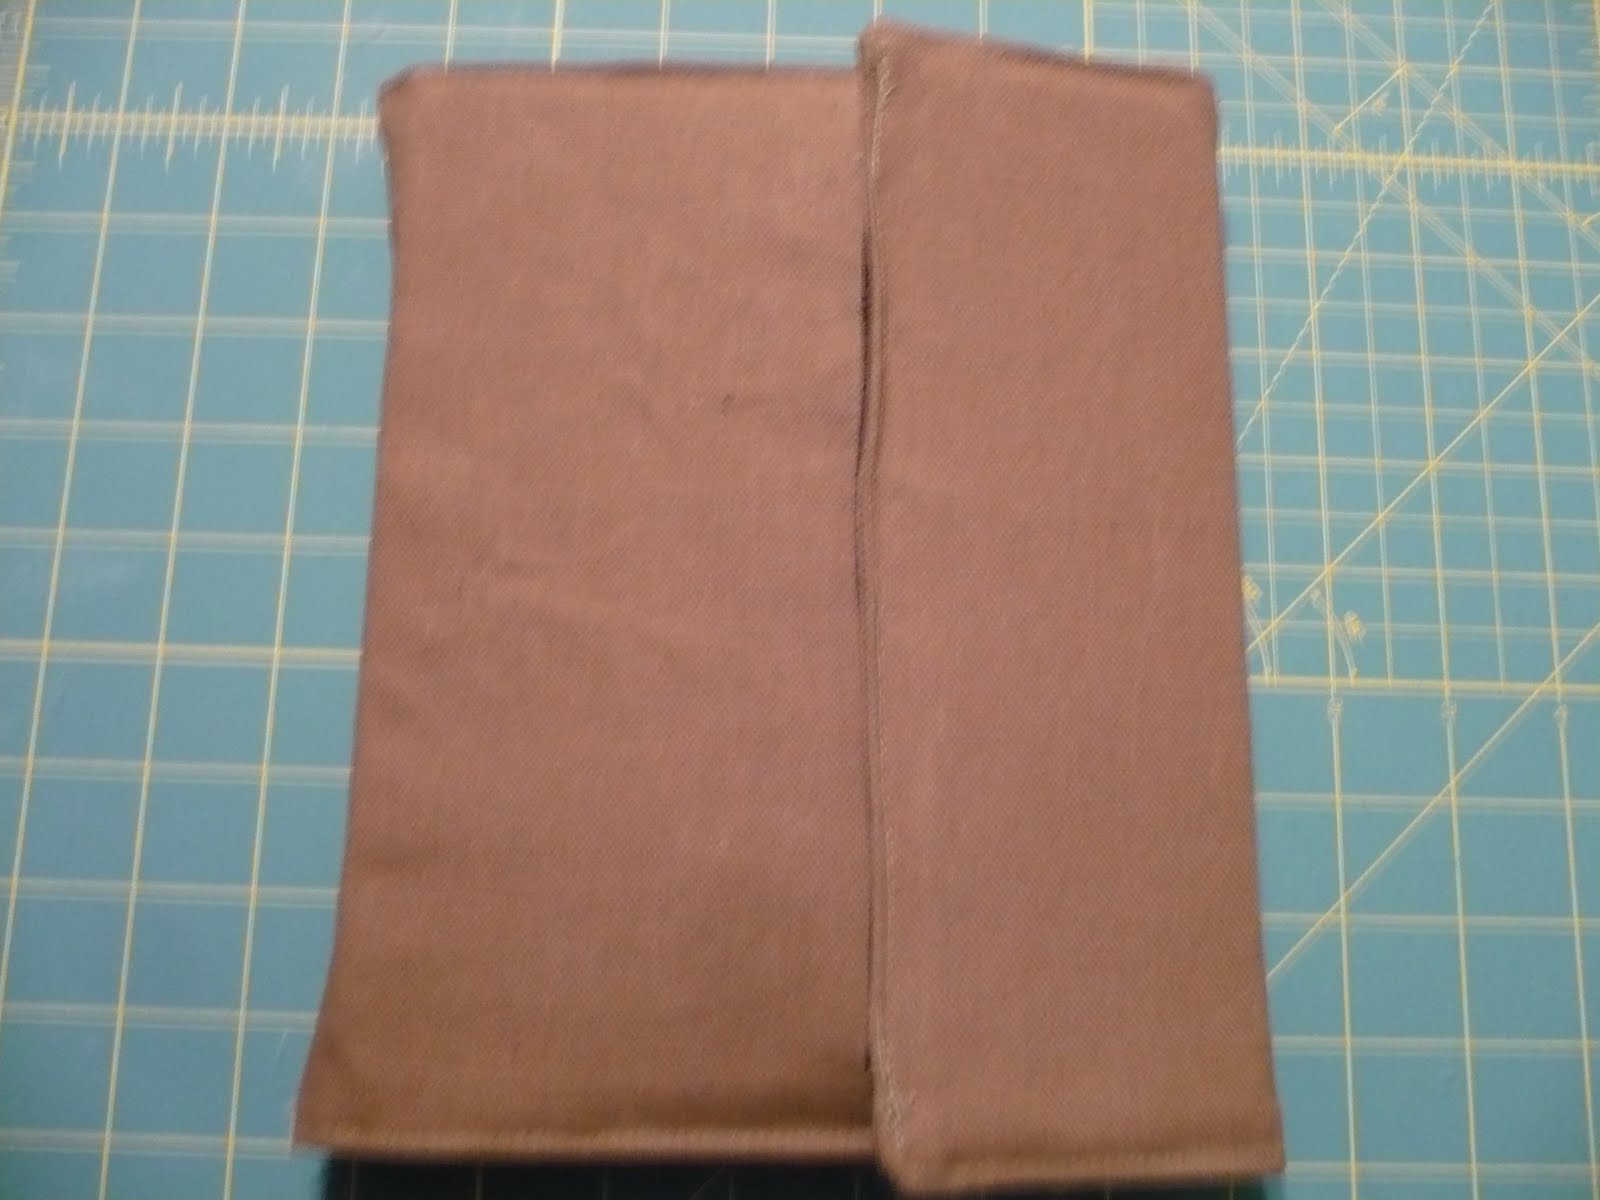
Here it is with the velcro flap open and then closed.
Since my husband gave me a Nook for Mother’s Day, I guess Version 2.0 will be in production soon. :)
Here are the latest additions to the parliament.
Both are very soft since they are made from up-cycled cashmere and wool sweaters.
Thanks again to Quirky Dame for the inspiration!
They are both waiting for new homes in my shop.
Yesterday I dropped this little owl off in Crestwood, Kentucky. It was raining some serious cats an dogs, so he was left at an inside location.
He was my second dropped toy for the Toy Society.
I hope he brings joy to whoever finds him.
About a week ago I contacted Julie of QuirkyDame to ask her if I could try to pattern an owl plushie based on her paintings for my next Toy Society drop in May. She said the wouldn’t mind my making one…so I set to it.
Here are a couple of her paintings that I drew my inspiration from.
I really love the purple and green one’s colors… and I seem to have a thing for purple and green together. I’ve worked in those colors often in different mediums.
I started out with a rough sketch to get the shapes and size of things down.

Then I cut out the individual main pattern pieces.. the body, and 3 wing sections. They eyes I used a tiny glass and traced around it on the back side of the white fabric with a marking pen. The beak was done free hand and the eyes are needle felted. All in all, I think he came out fairly well. :) I’m pleased. :)
Most of his body is made from left over cashmere sweater parts. The green striped part is wool sweater felt and the eyes are roving spinning wool. He is stuffed with shredded cashmere and wool scraps. He is so soft and squishy, I’m sure who ever finds him will love him.
So here is Owl 1, my toy Society Drop for May. I’ll drop him this Saturday. :)
All in all, I think he came out fairly well. :) I’m pleased and Julie of QuirkyDame has given me permission to make more and to list them in my shop for sale. So… Owls coming soon!
There were 2 entries in my Earth Day Upcycle Challenge.
I want to thank both these ladies for entering my little challenge. It is so inspiring to see what you have made from and old t-shirt and a sweater!
My sewing time seems to always be in fits and starts. I rarely get to finish a project in one sitting. This leads me to make little things that I can finish fairly quickly. As a result, I’ve been making lots of little things.
The other day I found a Melissa and Doug wooden kitchen cook set on clearance at a local shop. This has sent my creative juices flowing in the way of play food. I’ve made some crochet play food in the past, but never any sewn.
I came across a cute tutorial for little carrots by Clare’s Craftroom. It seems to have been intended for a stuffed rabbit, but they fit nicely in a toy cooking pot just as well. :)
I don’t normally have orange fabric laying around, so I used some leftover orange fabric from making last years Halloween candy buckets. It was the only orange fabric in the house! The different greens are a little bit of everything. I used 3 green fabrics for the leaves, scraps from a quilt, a stash fat quarter, and some other leftover fabric. The ribbon was a length of green that once held up a Christmas stocking to our banister.
I had more of the white cashmere felt scraps left, so I just cut out a couple of pieces to make a fried egg. I didn’t have any yellow or egg colored felt, but I had some wool yarn that would suit. A little bit of embroidery later and some machine sewing and we have a fried egg! Here it is frying up in Little Bit’s pan.
The great thing is I didn’t have to buy any of the supplies to make these. Great for stash busting and using up small scraps.
I’m hoping to get some more play food made. Little Bit really likes his pots and pans. Maybe I’ll try out something a little harder next time.
I’ve recently become aware of a group called the Toy Society from a post by Chez Beeper Bebe. They are a world wide group of people who make toys and leave them in different places for people to find, take home, and love. I’m excited to be a part of this and to make toys to drop. :)
Here is my first dropped toy. I used Chez Beeper’s Beddy-Bye Beast pattern. :) Too cute!
Kitty here is made of cashmere sweater pieces and stuffed with cashmere and wool bits.
The pictures aren’t the greatest…. I used a different camera than the one I normally use.
Recycling, upcycling and refashioning clothing is a great way to keep your crafting and sewing green!
I would like to see what you all can make from any article of clothing. For example, you could use a pair of jeans that are ripped and not wearable, a sweater that is too big, a t-shirt that has a stain, a thrift store find that you bought just because you liked the fabric, or anything you don’t wear anymore! What you start with can be any article of clothing, even socks, refashioned into something new! Make a plushie, a scarf, a purse.. whatever you like, just make it from an article of clothing.
This challenge will run from today, 13 April 2010 to 25 April 2010! You have until 12 noon on April 25 to complete your entry and submit it. Earth day is April 22nd, but a lot of people only get to do their crafting on the weekend, so the contest will end on the 25th so there are 2 weekends to make your great creations!
Please send one before picture and one after picture with your entry and explain what you made. Also include your e-mail address and name. Submit entries to emma.dandelion@gmail.com with the title Earth Day Challenge in the subject line. Open to US and Canada Residents only.
Each entry will be given a number in the order it was received. Random.org will be used to randomly pick a winner.
Winner will be announced on April 25th sometime in the evening. :) Winner will receive a set of my Crochet cotton facial rounds from WhiteDandelion which are a great alternative to disposable cotton balls and the sweater of their choice from EcoWoolies to keep on being green!